October 19, 2011

Halloween Banner

I love decorating for halloween.  Lately I have seen several cute halloween banners and decided I needed to make one for my house. 

I used this really great card stock that has one color on the top (orange) and another coordinating color in the core (lighter shade of orange).  The idea is to dry emboss the paper and then sand it to get the core color to show through.  If you look closely at my pictures above you will see that I dry embossed all of the orange pieces and sanded every other one to give it a little subtle texture.  I used my Cricut to cut out the black and orange paper and then used a glue runner to stick them together.  I also cut the letters out on the Cricut and alternated the colors between purple and green.

I used black tulle and black double faced satin ribbon to hang the letters.  In order to keep them from sliding together in the center I added a small silver brad that goes through all the layers of ribbon to hold it all together.  Oh yea, I attached a large silver grommet to the top of each letter card for the ribbon to go through.   It turned out great!

October 18, 2011

Spooky Halloween Wreath Craft

I just made the cutest Halloween wreath.  I love it and it was so easy too make. 
The wreath is made of orange burlap and each piece is cut to approximately 1"x 6" long and then tied to a wire wreath form.  Then I tied a tulle ribbon bow to the top to hang it with.  The ghost was added later.  I bought it at JoAnn's and just tied it on. 
I hung it above my fireplace on top of the mirror using a suction cup hook.
Cute!

December 10, 2010

Hand Stamped Christmas Cards

These are my Christmas Cards.  I hand stamped them with a really cute Stampin' Up stamp set.  Then I colored in the stamped design with water colors. 
As a final touch I added colored card stock and a ribbon.

I think they turned out great! 

For stampin up ideas and products click here.

October 17, 2010

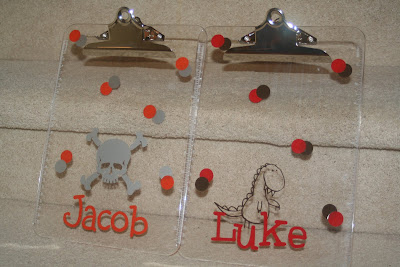
Clipboards Make Great Gifts

I wanted to share these clipboards that I made using my Cricuit. These clear clipboards are very inexpensive and I have just decorated them with vinyl. There is a bit of a trick to this though. The vinyl lettering needs to be cut as a mirror image so that when it is applied from the back side of the clipboard it reads correctly. The vinyl can be stuck onto the front but would be a little bumpy to write on.
They turned out great and everyone loves their new personalized clipboards.