December 14, 2009
Personalized Boots & Dry Erase Boards
December 6, 2009
Hot Cocoa Sliders
I just found the cutest idea for an inexpensive give for teachers or school friends or neighbors, etc... It is called a hot cocoa slider. I came across this at mypinkstamper.com and decided to make some of these. Here is the link to the instructions if you are interested.
Here are some pictures of my finished "sliders". I love them. They are so cute and easy to make. And, don't forget cheap. Luv it!!!
December 5, 2009
More Vinyl Crafts
December 2, 2009
December 1, 2009
Christmas Pictures
I think the idea of getting the perfect picture of the kids all together for a Christmas card is what a lot of parents dream of this time of year. The reality (for me) however is that this is a near impossible task to achieve. You take about 200 pictures praying to get just one "good" one that would be suitable for the family Christmas card. Thank goodness for digital cameras. I'm so glad that I can look through my pictures on the computer or even on the tiny camera screen and just delete the duds. No trips to the 1 hour photo only to discover that there are no "keepers."
Here is a sampling of what I came up with this year.
October 24, 2009
Cuttlebug Giveaway

I just entered to win a Cuttlebug over at SVGcuts.com. You can enter too by going to http://svgcuts.com/blog/?p=3672.

Good Luck!
July 19, 2009
My Bottlecap Project
This is my new favorite craft!!!
 Well I finally made some of the bottlecaps that I mentioned in an earlier blog post. Can you say addicting??? I love these things, and so does everyone that sees them. They have become a big hit around here. I have gone a little crazy (OK maybe a lot) and made LOTS of them. They are so much fun to make. Even the kids enjoy making them with me (so you know it can't be that difficult). Check out my pictures and let me know what you think.


 I have sold a lot of these since I started making them (over the summer). If you would like one (or two or three) send me an email and I'll be happy to make whatever you would like. Thanks for looking! Don't forget to leave me your comments.
 Well I finally made some of the bottlecaps that I mentioned in an earlier blog post. Can you say addicting??? I love these things, and so does everyone that sees them. They have become a big hit around here. I have gone a little crazy (OK maybe a lot) and made LOTS of them. They are so much fun to make. Even the kids enjoy making them with me (so you know it can't be that difficult). Check out my pictures and let me know what you think.


 I have sold a lot of these since I started making them (over the summer). If you would like one (or two or three) send me an email and I'll be happy to make whatever you would like. Thanks for looking! Don't forget to leave me your comments.
June 8, 2009
Chetzels (Chocolate Pretzels)
Ok... I "stumbled upon" this interesting looking recipe the other day and couldn't quit day dreaming about it. It looked so tasty! So... I talked the kids into working with me and together we put together these FABULOUS treats! They are SOOOOO GOOOOOD!!!! We call them "Chetzels" because they are a combination of Chocolate and Pretzels.
Needless to say... they didn't last long. :) We shared some with our neighbors and devoured the rest within 2 days. Their flavor is slightly addicting (BTW).
OK... Here are the ingredients:
1 Bag of Hershey's kisses (we used a mixture of kisses and hugs)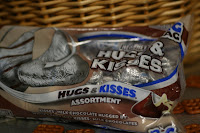
1 Bag of M&M's (we used plain but peanut would work just as well)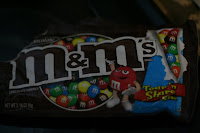
1 Bag of Snyder's Pretzels (the square one's with the grid)(yum)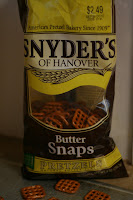
Step 1: Preheat oven to around 200 degrees.
Step 2: Spread out a bunch of pretzel squares on an ungreased baking sheet.

Step 3: Unwrap the kisses and/or hugs and put one on top of each pretzel square. (Hint: we separated the kisses and hugs onto separate trays because the hugs melt A LOT faster than the kisses do and will need to be taken out of the oven sooner)
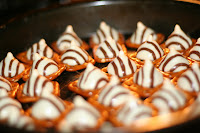
Step 4: Put them into the oven for approximately 3-5 minutes. Just long enough to soften the chocolate but not melt it. Keep an eye on it because it doesn't take long at all.

Step 5: Take them out of the oven and press an M&M into the center of each one and let them cool. As they cool they will firm up again. (At least in theory... the hugs didn't want to harden again after we softened them, until we put them in the refrigerator for about 15 minutes.)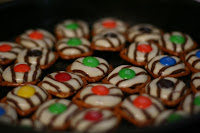
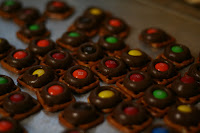
Step 6: Eat and Enjoy!!!
Now go and get your supplies and get started.
This is a fun and easy baking project to involve the kids in. My kids loved every minute of it! Especially sneaking a kiss every now and again. :)
Needless to say... they didn't last long. :) We shared some with our neighbors and devoured the rest within 2 days. Their flavor is slightly addicting (BTW).
OK... Here are the ingredients:
1 Bag of Hershey's kisses (we used a mixture of kisses and hugs)
1 Bag of M&M's (we used plain but peanut would work just as well)
1 Bag of Snyder's Pretzels (the square one's with the grid)(yum)
Step 1: Preheat oven to around 200 degrees.
Step 2: Spread out a bunch of pretzel squares on an ungreased baking sheet.
Step 3: Unwrap the kisses and/or hugs and put one on top of each pretzel square. (Hint: we separated the kisses and hugs onto separate trays because the hugs melt A LOT faster than the kisses do and will need to be taken out of the oven sooner)
Step 4: Put them into the oven for approximately 3-5 minutes. Just long enough to soften the chocolate but not melt it. Keep an eye on it because it doesn't take long at all.
Step 5: Take them out of the oven and press an M&M into the center of each one and let them cool. As they cool they will firm up again. (At least in theory... the hugs didn't want to harden again after we softened them, until we put them in the refrigerator for about 15 minutes.)
Step 6: Eat and Enjoy!!!
Now go and get your supplies and get started.
This is a fun and easy baking project to involve the kids in. My kids loved every minute of it! Especially sneaking a kiss every now and again. :)
June 2, 2009
Bottle Cap Jewelry


I am going to try this project this week. This should be fun and easy enough for the kids to do as well. Bottle cap jewelry is becoming very popular among kids these days.
I am going to post some pictures of my results. Check back soon.
June 1, 2009
Check out How to: Make a Star Shaped Ribbon 2
This is a good video on how to make a star shaped ribbon. Learn something new every day!
Take a look at: How to: Make a Star Shaped Ribbon 2
May 31, 2009
Marble Crafts
Ok, here are the magnets I made using the notmartha.org directions. These are a lot of fun to make. I came up with a marble/bottlecap combo design. They all turned out really cute.
 What do you think? I would love your feedback.

 What do you think? I would love your feedback.
May 3, 2009
Awesome Marble Craft
I just found the neatest craft idea over at notmartha.org. It is the cutest marble magnet craft. I can't wait to try it! My head is swirling with ideas. :)
to make : marble magnets
  (mini tropical vacation) | |
 | First I thanked myself for saving all those magazines. Then I hunted through for tiny pictures, I used the marble itself to test, then traced a circle the size of the magnet and cut it out with scissors. A perfectly sized craft hole punch would save a lot of time here. |
 | Gathering the stuff - silicon glue, cut out pictures, magnets, and marbles. I put paper down so I wouldn't ruin my cheap Ikea coffee table. Ok, at this point I have to admit my initial failing. I, of course, didn't check to see what type of glue would be best before I went to the store so I got Crafter's Goop first. I'm sure it works really really well, but man does it smell strongly! It's been three days since my first try and it's still at the stage where you sniff it once, but not again because you know it can't be good for your lungs. I went back, and on advice from the Paper Candy instructions, found silicon glue. It doesn't have a strong odor and seems to just work just right. |
 | note: I forgot a step. A few people suggest gluing down a white round of cardstock first (junk mail comes in great here) as the glue can seep through your picture and show the dark magnet underneath if you don't. It didn't seem to affect my magnets, I used magazine pictures which are fairly flimsy, however I will have to test it to see if my whites could be whiter. I used a toothpick to spread a thin layer of the glue on the magnet, and put the picture down over that. I had a few seconds to slide the picture into place if needed. I used a toothpick because really strong glue in squeezey metal containers hates me and gloops everywhere. I squeezed a tiny amount of the silicon glue onto some paper and used the toothpick from there. No traumatic events occurred and I don't need to go back to Ikea to replace the table. |
 | Using the toothpick again, I dabbed a bit of glue, about the size of a lentil, onto the middle of the picture. |
 | Lower the marble straight down onto the glue. |
 | And press down in the center. You can see the glue spreading out to the corners making a nice seamless, hopefully bubble less, magnet. Any of those ripples on the bottom of the marble will magically disappear. This whole thing is very satisfying. |
 | One word of warning, some of my marbles were too small and the pictures stuck out. Really though they won't show once they're on the fridge. I hope. At first I was wary of how thick the magnets themselves are, but now I appreciate it as it gives the whole thing enough height to hold on to when you're prying it off the fridge door. Um... I feel like I'm forgetting to say something. I'll let you know when I remember what it was. |
 | small update: I made these at night under my living room lamp (thus the bad photos), and the marbles seemed fine. But in the light of day I discover they have scratches on the outer surface. Nothing bad, just not quite the perfection it seemed. So do make sure you have decent light, as if you needed to hear me say that. |
 | update 12.23.02 I read about cabochons at this thread and this thread on Glitter, I didn't quite know what they were. I found some at Tap Plastics while I was there - they make them in 1" and 1/2" sizes. I bought some 1" ones and made some Christmas magnets, they are the two bottom and middle one in the picture at the left. The pictures at the Tap Plastics website is sort of unclear, they are solid half spheres, there is no hollow space in the middle. The 1/2" cabochons Tap carried were just slightly too small to fit over my 1/2" magnets. |
  | A picture of the side and the bottom - I used the 3/4" magnets. To make these I pressed the cabochon onto the picture first and allowed to set, then I attached the magnet. You can buy these individually at a Tap Plastics, or in quantities of 100 from thier website. Tap Plastics has stores in California, Oregon and Washington. I am sure there are other places to find them or order them online as well. The Glitter threads talk about using plastic cabochons for making marble jewelry. note: if you're wondering where to buy blank Altoids style tins, or other style tins, see Impress Rubber Stamps (look under Packaging), or try a Japanese stationary store if there is one near you. |
 | |
 | |
 more sets I've made | |
 six 3/4" magnets fit in one Altoids sized tin very nicely I have also searched and found some great resources for supplies on etsy.com. I just ordered some and will write a post with the finished products. I can't wait. I love making things. | |
Subscribe to:
Posts (Atom)


